Although Windows To Go was discontinued, there still has a workaround to install Windows 11 on a portable/external SSD, even works on MacBooks (Intel chip). Here we go…
Prerequisites
working Windows/macOS system
a fast SSD drive, the faster the better
wired keyboard and/or mouse (MacBook’s keyboard and touchpad won’t work during Windows installation)
Write Windows 11 to the external SSD
Download the Windows 11 ISO from Microsoft’s official site: https://www.microsoft.com/software-download/windows11.
Download Rufus, a Windows software to create portable Windows installation on external SSD.
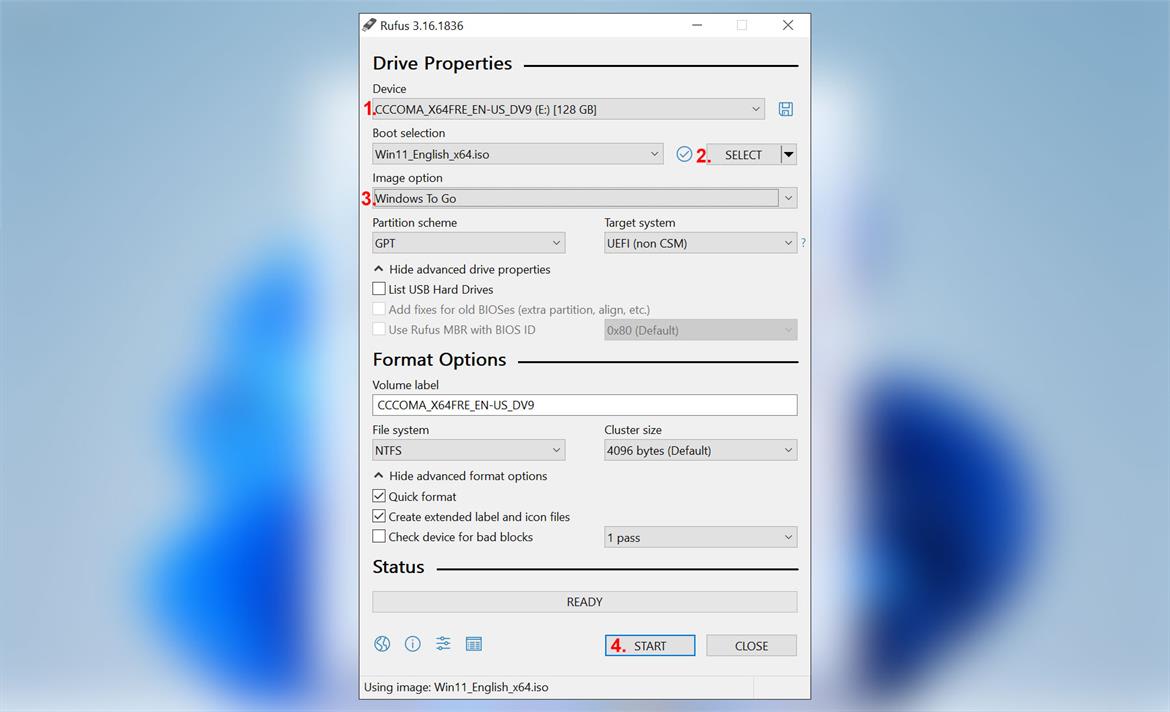
On a working Windows system, run Rufus to write Windows installations files to SSD with the following steps:

Choose the SSD device that will hold the Windows system. If the targeted SSD drive is not shown in the list, select the List USB Hard Drives in the Hide advanced drive properties section.
Select the Windows 11 ISO file that just downloaded.
Switch the Image option to Windows To Go mode.
Click START to write files. This will take a while, which depends on the speed of the SSD.
Prepare drivers
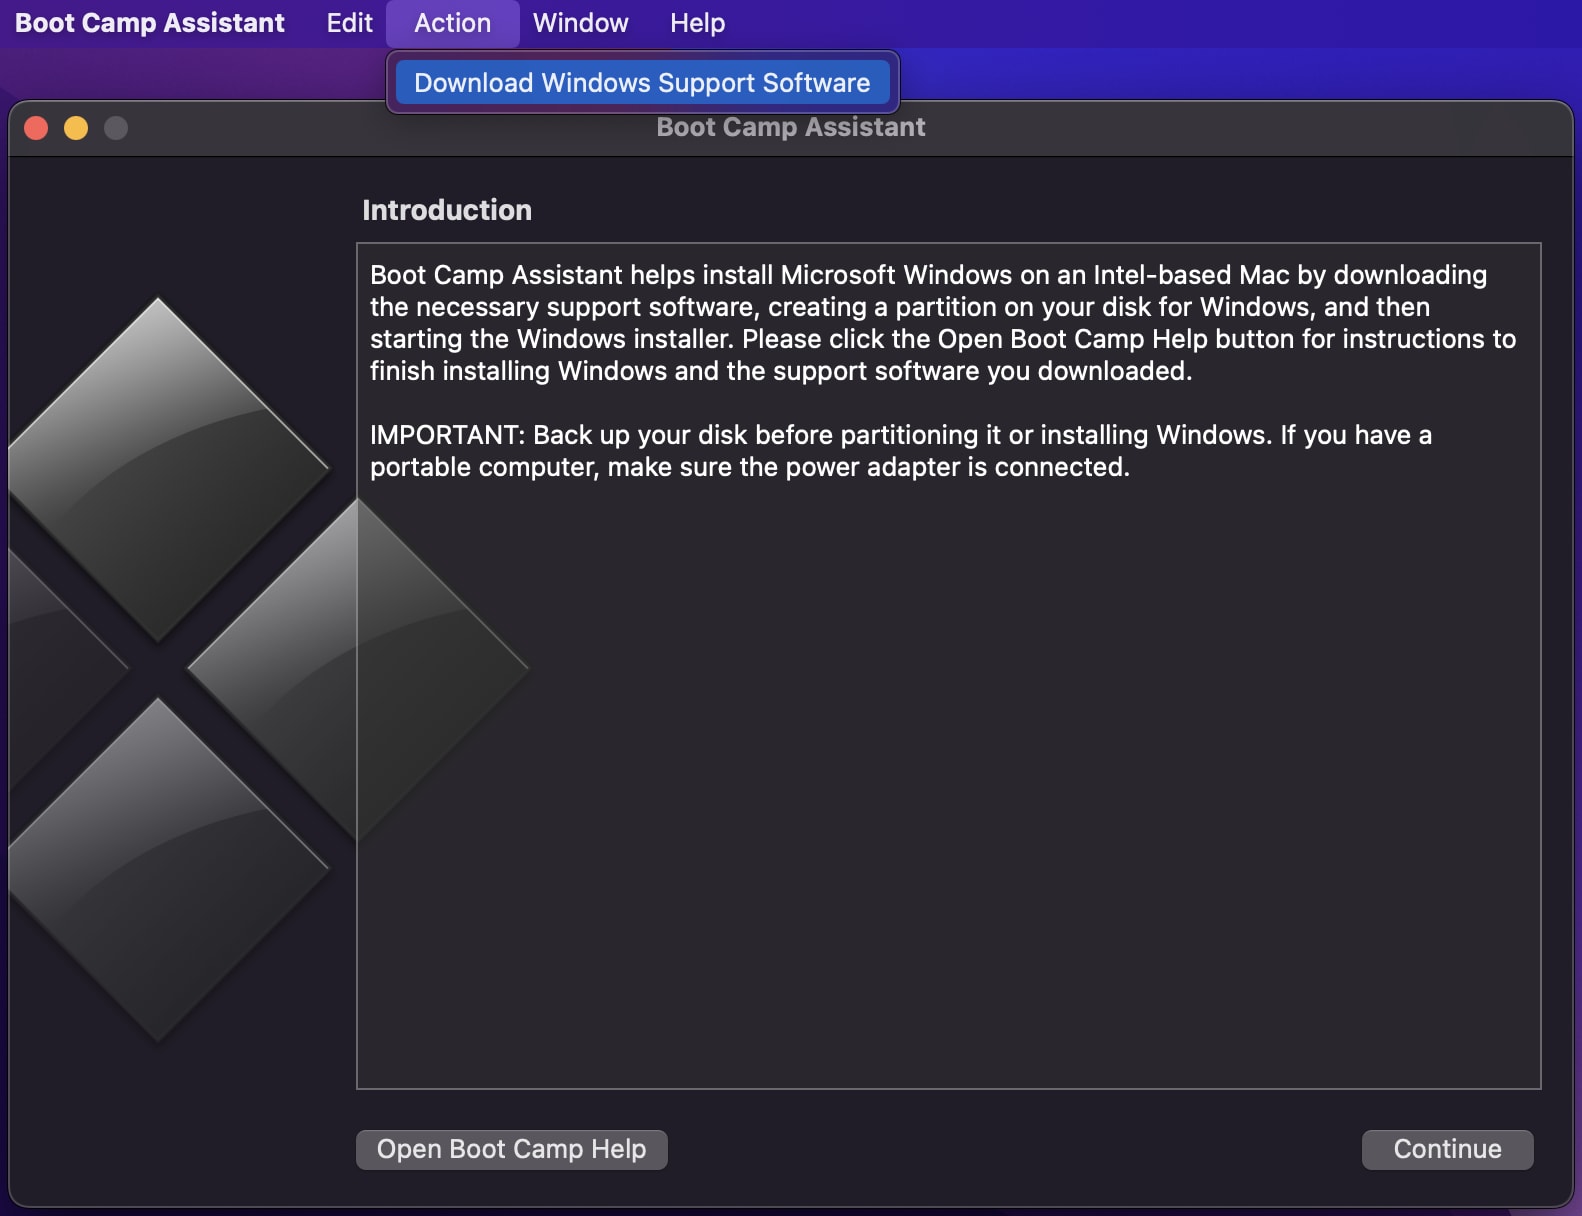
Then back to macOS, download the Windows Support Software (drivers) from Boot Camp Assistant:

It’s okay to copy the downloaded package to the external SSD that just operated with Rufus.
Windows installation
Restart the MacBook, press and hold the command (⌘) + R key combination to start up from the built-in macOS Recovery system.
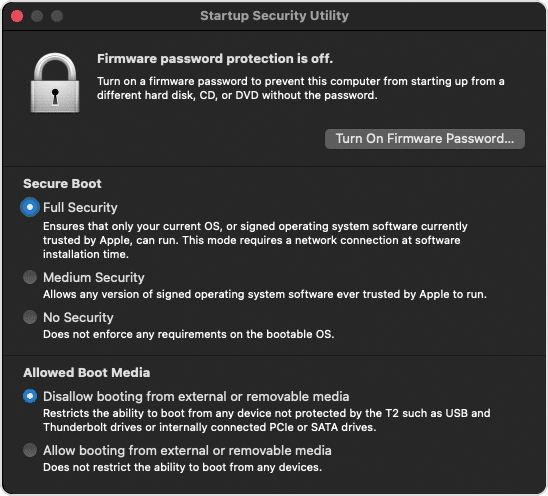
When you see the macOS Utilities windows, choose Utilities > Startup Security Utility from the menu bar.
Then select the No Security and Allow booting from external or removable media options:

Now, restart the MacBook again, and press and hold the option (⌥) during startup. Then select the external SSD drive, and follow the guides to install Windows 11. You will need a wired keyboard/mouse as the MacBook’s drivers are not working during this process.
Update drivers on Windows
After finishing Windows 11 installation, boot into the Windows system (press and hold the option).
Install the Windows Support Software that got from the Boot Camp Assistant, this will make most of the device drivers (i.e., keyboard, touchpad, bluetooth, and wireless network) work.
For me, even though Windows Support Software was installed, some drivers still did not function well (yellow “!” in Device Manager ). I have to install them manually.
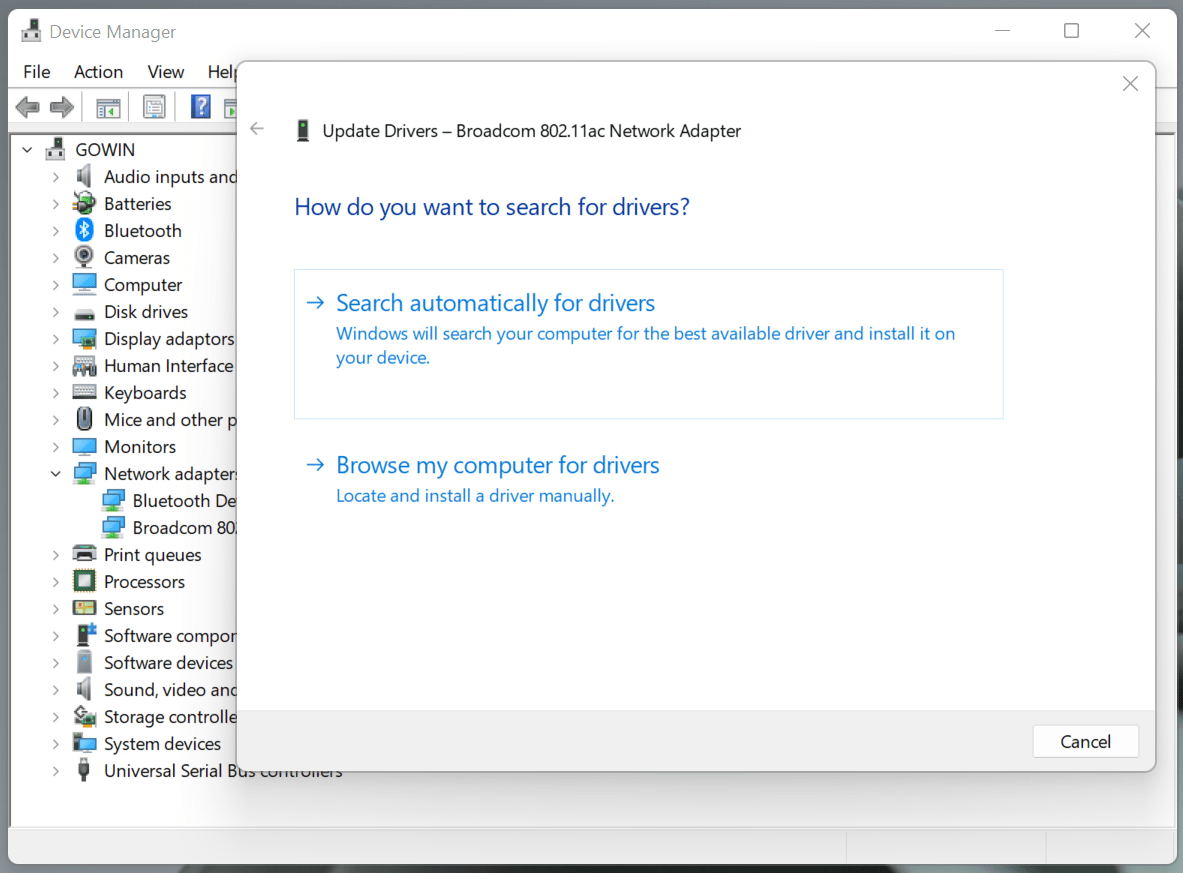
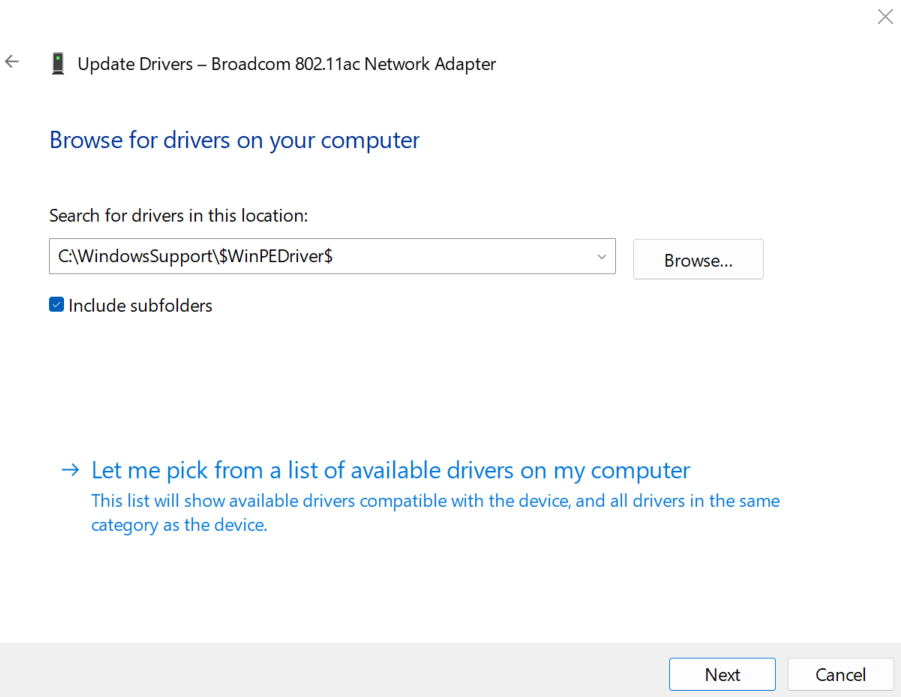
In Device Manager, select the device and right-click to select the Update Driver option. Choose the Browse my computer for drivers option:

The drivers can be found in the downloaded package from Boot Camp Assistant, here I’ve put the files under C:\WindowsSupport folder. Make sure the Include subfolders were selected, it will automatically choose the corresponding driver to install/update:

After the above installations, all devices should work as normal. You’d better run Apple Software Update for Windows to get updated software and drivers. Windows Update will help update some required drivers as well.
That’s it. To work on Windows 11, just plug in the SSD drive and boot from it (press and hold the option). The performance is much better than Virtual Machines… 


