As long as the traffic grows for my journal site, I’m curious about how many people visit my site, which posts are most visited, and where users come from. Although Google Analytics can help, almost every ad-blocker will kill it and resulting in less information. After searching for alternatives, I came across a lightweight Node.js application, Ackee. It’s a privacy-first solution that provides the basic analytics just what I needed. So, let’s deploy it with all the free resources.
Meet Ackee
Ackee is an open-source analytics tool built with Node.js. Following is how Ackee describes itself:
Self-hosted, Node.js based analytics tool for those who care about privacy. Ackee runs on your own server, analyses the traffic of your websites and provides useful statistics in a minimal interface.
At present, Ackee supports several deploy strategies:
- Docker
- Helm
- Netlify
- Vercel
- Heroku
- Render
Here, I’m going to deploy with Vercel, see Get Started for other related deployment methods.
Deploy Ackee to Vercel
Before we start, we need to prepare a running MongoDB database. You can register a free account with 500 MB cloud storage on mongodb.com. Set and get the database’s connection URL and password.
After that, just click the one-click to deploy button to deploy Ackee to Vercel (if it’s not working, see updated document at deploy to Vercel). It will pull the git repository and push to your Git account and then deploy the Ackee to the Vercel platform. When prompted to select a directory, just select the root directory.
Overwrite Vercel’s default build configuration:
- set the build command:
yarn build - set the output directory:
dist
Set up the following environment variables, all these variables will be encrypted by Vercel:
ACKEE_USERNAME - the user name to login Ackee’s web interface.ACKEE_PASSWORD - the password for the user to login Ackee’s web interface.ACKEE_MONGODB - the full MongoDB database connection URL with configured database user name, password, and database name.ACKEE_ALLOW_ORIGIN - e.g. ACKEE_ALLOW_ORIGIN="https://example.com", ACKEE_ALLOW_ORIGIN="*", and ACKEE_ALLOW_ORIGIN="https://example.com,https://example2.com".
After these settings, Vercel will deploy and running the Ackee for you.
You can also set up a custom domain for the Ackee instance on Vercel.
Ackee options
By default, the name of the Ackee tracking script will be tracker.js. We can rename it to a custom name by setting a environment variables in Vercel (without .js).
ACKEE_TRACKER=custom_name
Ackee will encode your custom name to a URL encoded format. Avoid characters that can’t be used in filenames.
Set up the tracking script on website
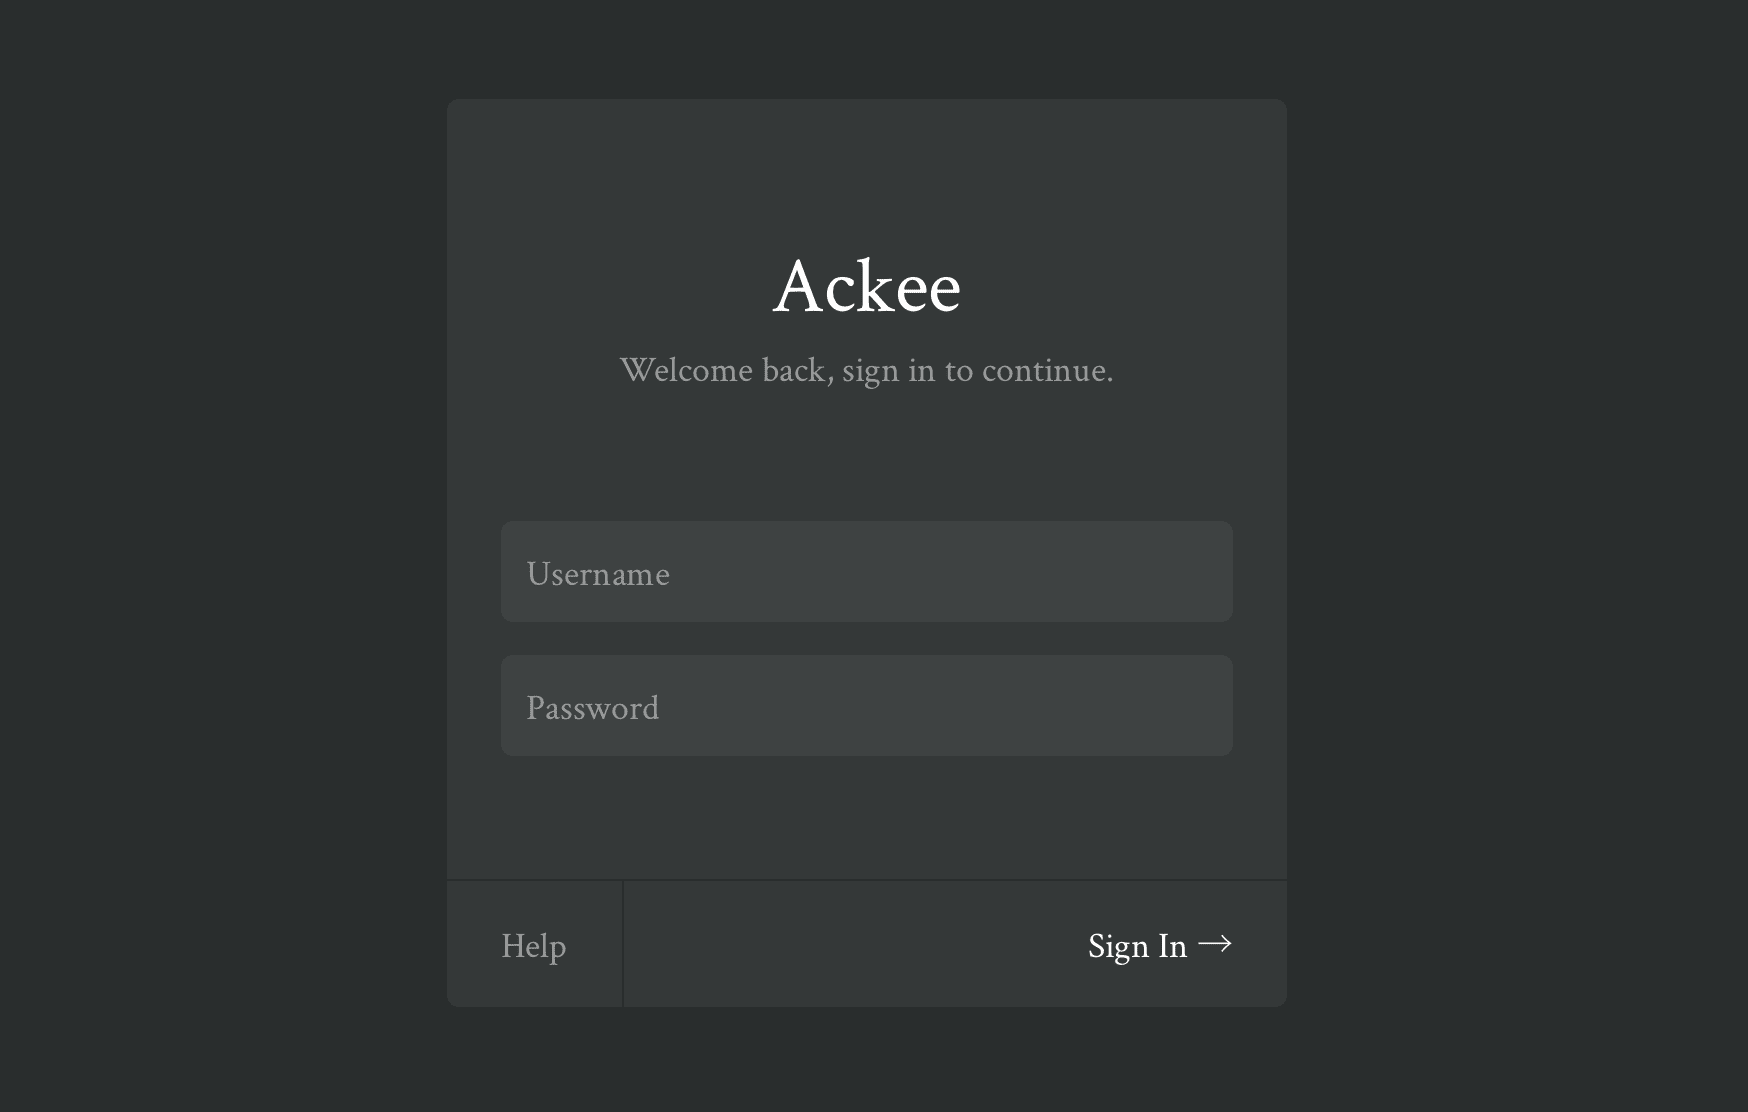
Open the webpage Vercel automatically configures for you, it should looks like https://example.vercel.app (or your custom domain), and should see this login page:

Login to your Ackee web interface, in Settings panel, set up a New domain in the Domains section. You should also see the the tracking code (embed code) with a unique domain-id.
Copy and paste that embed code to your sites that you need to collect the web analytics data.
And voila! You’re finished, just wait for network requests to your site.
Ackee won’t track personal information by default. If you want to enable detailed information such as screenWidth, deviceName, browserName, etc., set the script as follows:
<script async src="https://example.com/tracker.js" data-ackee-server="https://example.com" data-ackee-domain-id="hd11f820-68a1-11e6-8047-79c0c2d9bce0" data-ackee-opts='{ "detailed": true }'></script>
Just update the data-ackee-opts attribute, others remain the same as the embed code got from Ackee web interface in previous step.
If you have set a custom name for the tracker file, don’t forget the update the tracker.js to your_custom_name.js…
Updating Ackee
Vercel adds a forked version of Ackee to your Git repository. We just need to pull the newest code from the Ackee’s original project. Pushing those changes/updates to your repository will automatically trigger a new deployment on Vercel with newest version of Ackee.
git clone the forked Ackee from your Git account
On your local fork, specify the remote upstream repository of original Ackee.
git remote add upstream https://github.com/electerious/Ackee.git
Verify the new upstream repository you’ve just specified for your fork.
Fetch the branches and their respective commits from the upstream repository.
Check out your fork’s local default branch.
Merge the changes from the upstream default branch into your local default branch. This brings your fork’s default branch into sync with the upstream repository, without losing your local changes.
git merge upstream/master
If your local branch didn’t have any unique commits, Git will instead perform a “fast-forward”.
Push changes back to your Git account.